Wednesday, December 30, 2015

Homemade Pfeffernusse cookies


We just made these and used 2 teaspoons of cloves...they are wonderful! Of course they are even better after several days (not so strong and we worried the 2 t. was a mistake at first!). 
My mother keeps insisting that they should have black pepper. Is that really a traditional ingredient? 
I think they would be good with the bottoms dipped into dark chocolate- something like the chocolate covered, soft gingerbread cookies that Aldi's sells. Ours had a nice cross between soft and chewy texture. 
We cooked them a little longer, they were just too soft at 10 minutes. 

Wednesday, November 25, 2015

My First Slab Apple Pie

This was also my first all butter crust.  I usually make mine (here) with a food processor, but I mixed this one by hand, with a pastry blender. You can SEE the lumps of butter in the raw dough, and the crust really LOOKS flaky!  =)

We used our own recipe for the filling...we like the spice ratio we've used for years:
1 & 1/4 t.  Cinnamon
1 & 1/4 t. Nutmeg
(no allspice)

You'll find the recipe here:
http://smittenkitchen.com/blog/2013/10/apple-slab-pie/
 Notice that it calls for 1 1/2 Tablespoons of Sugar and 1 1/2 TEASPOONS of salt.  
Happy Thanksgiving!

 You can see the lumps of butter!


 Cream brushed on top and then sprinkled with Demerara sugar.

Four pounds of organic Honeycrisp apples!  Yum! 

Tuesday, November 24, 2015

Cream Biscuits


Cream Biscuits
Using rich whipping cream eliminates the need for measuring and mixing butter or shortening in these easy-mix, extra tender biscuits.  You can freeze these biscuits and cook them straight from the freezer if you like. =) 

Ingredients

1 3/4 cups all-purpose flour (we used unbleached organic from Costco)
2 1/2 teaspoons baking powder
1 teaspoon salt
About 1 1/4 cups whipping (heavy) cream

Directions

  • 1 Heat oven to 450ºF.
  • 2 In large bowl, mix flour, baking powder and salt. Stir in just enough whipping cream so dough leaves side of bowl and forms a ball. (If dough is too dry, mix in 1 to 2 teaspoons more whipping cream.)
  • 3 Place dough on lightly floured surface; gently roll in flour to coat. Knead lightly 10 times, sprinkling with flour if dough is too sticky. Roll or pat 1/2 inch thick. Cut with floured 2-inch biscuit cutter. Place about 1 inch apart on ungreased cookie sheet.
  • 4 Bake 10 to 12 minutes or until golden brown. Immediately remove from cookie sheet to wire rack. Serve hot.
For Cheddar Bay type we doubled the recipe and added:
4 teaspoons garlic powder
1 teaspoon or so of dry parsley
½ teaspoon cayenne pepper
12 oz grated cheddar cheese (sharp would be best for flavor)
We added the cheese to the dry ingredients, then added the cream.

You can freeze these biscuits and cook them straight from the freezer if you like. =)

Tuesday, October 20, 2015

Honeyed Jalapeno Rings

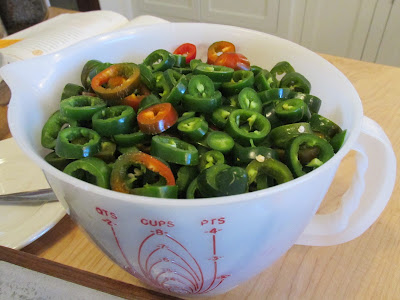
Adrienne prepped 2+ pounds of our organically grown jalapeno peppers, so we could make...
..."Honeyed Jalapeno Rings" found in  The Joy of Pickling(We really like this book.)


Some garlic slices and 3 peppercorns for each jar.
Eight half-pints!


Saturday, August 22, 2015

Homemade toothpaste

No, it's not guacamole!  It's actually grey, not green!   


6 T Bentonite Clay
6 T Baking Soda
2T MSM
2T Xylitol
1 T Fennel Powder
75 +/- drops of Fennel* Essential Oil
3 smidges of White Stevia Powder
2 T unscented liquid Castille soap
Nutiva Extra Virgin Organic Coconut Oil to make paste consistency.
I fully expected to tweak it with more sweetener and flavor, but hubby deemed it good the way it was.  So, we have a nice supply of toothpaste that will last a while! 
 I've since read about using activated charcoal in toothpaste and will add that to the next batch.  Bentonite clay was what we happened to have in abundance, I might try another type next time.  Also, adding powdered horsetail would be good, but I didn't have any.  

 *You can flavor it any way you like....we've used peppermint and fennel....
 

Friday, August 21, 2015

Pesto Pasta Salad

Yum!  One 1/2 pint jar of basil pesto from the freezer....1 pound package of organic pasta from Costco, cherry tomatoes and sweet red peppers from our garden (I sauteed the peppers first), one pound + cubed mozzarella from Costco and some fresh Italian Romano and Parmesan cheese.... the pasta was too hot when I added the cheese and some of it melted into a gooey mess, but OH, WAS IT EVER GOOD!  Especially eaten right away....it lost something when chilled and eaten later, but it was still good...with more Parmesan on top, of course!   We added black olives the first time we made this and we forgot this time! 


Pesto recipe:
(if you click on the recipe, it should pop-up larger) we've made it with pine nuts as well as walnuts....well, walnuts ARE cheaper! 


Friday, July 31, 2015

EASY Healthy, Homemade Dark Chocolate

"Sinfully Delicious Salted Dark Chocolate"

This recipe was written by Amy Kelso of Backat the Ranch. Easy, tasty chocolate that is good for you!  We use Organic, Fair Trade cocoa powder from Frontier.  =)

This makes a great healthy candy, but be careful how you store it.  Coconut oil melts around 72°F!
    
Ingredients
  • 1 cup Coconut Oil  (We use the ratio of 1:2 Cocoa Butter 2 -1/4 oz & then Coconut Oil up to 7 oz total) 
  • 1 cup organic cocoa powder (3 & 1/4 oz)  (I just realized that I was accidentally using 1/2c! Well--it was good like that, but I'll have to try the whole amount next time, lol!)
  • 1/2 cup raw, local honey (5-6oz)
  • 1 tsp. natural vanilla extract
  • 2 Generous pinch of organic coconut sugar (or 1T Sucanat)
  • 2 Pinch of sea salt =)
    Optional: 1c rice cereal or granola & 1-2c chopped nuts, dried fruit, etc.
Instructions
  1. Melt coconut oil & honey in sauce pan over low heat. (We found that you have to heat it till it starts to bubble a bit- otherwise it will not harden properly.)
  2. Add cocoa powder, blend well.
  3. Stir in a pinch of coconut sugar and sea salt.
  4. Remove from heat.  (this is when you would add the optional crunchy stuff)
  5. Line a shallow baking dish with parchment paper.
  6. Pour chocolate mix onto paper lined dish.
  7. Refrigerate (or freeze) until chocolate solidifies.
  8. Cut into squares or break into bite sized pieces.
  9. Store in refrigerator. (or freezer)
Notes I collected from the original blog post:
"You can adjust the amount of honey and coconut sugar to suit your personal taste.  I like mine a little less sweet and will often cut the amount of honey in half."

"Experience has shown me (experience and some helpful comments from my readers) that this chocolate will be an oooey gooey honey-fied mess if not spread thinly enough… so word to the wise."

"If you like, you can save your sea salt ’til the final step.  Sprinkling sea salt on top of your cooling chocolate adds to the visual appeal."

Saturday, July 11, 2015

Oven Baked French Toast

We've made this recipe for years!  It's a special treat breakfast, not an everyday type of recipe....I snipped this from a Parents Magazine back in the mid-1980s.  We've never made the Praline Syrup...we prefer REAL maple syrup!  You can use an extra egg and add cinnamon and any dense bread works well. 

 Serving suggestion....if it's your birthday dinner (Adrienne's - March 2015) all the bacon you could want on the side! 

Once we made it while we were out of town visiting family and didn't have the recipe so we made it from memory and accidentally used an entire stick of butter.  We decided that was the way to go!  So in these photos that's how we made it.  Yum! 


It's easiest to soak the bread in a second 9X13 pan...yes more dishes, but it works well.  Notice the bubbling butter?!
 After turning...

 
And if there IS any leftover it's REALLY good to snack on! 

Thursday, May 21, 2015

Almond Milk

Not to be used as a milk replacement for babies!


We followed the Vita-Mix directions.

1 cup raw almonds (I sprayed them with H2O2 first)

3 cups water

Blended as per directions.

There was a lot of thick, creamy pulp left....we added it to the quiche recipe we were making, could be used for crackers or added to breads or smoothies....

In the future we will soak the almonds in salt water overnight and skin them (like we usually do) then try this recipe again.

Unless this is really scrumptious we'll probably stick to using almonds for nut butters and snacking.

 We like to salt water soak, skin and dehydrate almonds, then toast them briefly in the oven.  Yes, that's a lot of work and steps to follow, but that's the way we like them.


Next adventure....almond butter from the Vita-Mix!  Stay tuned....

Friday, February 20, 2015

Yeasted Waffles (with recipe!)

Adrienne saw this recipe in  Benjamin's Cook's Illustrated Baking Cookbook.   A quick look on the internet brought up several...  This is one I found:  http://www.smells-like-home.com/2014/06/yeasted-waffles/


The best waffle recipe we used to make involved separating eggs, melting butter, etc.  Benjamin used to make them.....very good, but a lot of mess!   So when we read about this yeasted waffle recipe we just had to give it a try!  Yes, they are the best, next to the buttery oat ones I mentioned above!  The leftovers are so easy to toast and warm up!  These were really good with grated sharp English Cheddar cheese mixed in.

NB:  choose your vessel well.   The first time we made them we ended up with batter oozed out into a cooler all over the ice bottles and kombucha bottles that were also being stored in the "extra fridge space on the porch"!   Make sure your bowl is large enough!   

Notes from Food.com:  The batter must be made 12 to 24 hours in advance. Texture of the waffles made in a classic waffle iron is better. But a Belgian waffle iron will work, though it will make fewer waffles. The waffles are best served fresh from the iron but can be held in an oven until all of the batter is used. As you make the waffles, place them on a wire rack set above a baking sheet, cover them with a clean kitchen towel, and place the baking sheet in a 200-degree oven. When the final waffle is in the iron, remove the towel to allow the waffles to crisp for a few minutes. These waffles are quite rich; buttering them before eating is not need and may be to much for some.  (NOT us!!!)

 
Yeasted Waffles
Yield: Seven 7-inch round or four 9-inch square waffles
Prep this waffle batter the night before you plan to make waffles and give yourself a break from prepping breakfast in the morning. This works especially well when you have house guests or if you're hosting brunch.

    For the waffles:
  • 1 ¾ cups milk
  • 8 tbsp unsalted butter, cut into 8 pieces
  • 2 cups all-purpose flour  (we used white spelt flour and a bit of oat flour)
  • 1 tbsp granulated sugar
  • 1 tsp table salt
  • 1 ½ tsp instant yeast
  • 2 large eggs
  • 1 tsp vanilla extract
       
      Topping suggestions:*
    • Pure maple syrup
    • Peanut butter sauce and bananas
    • Whipped cream
    • Blueberry jam
    • Fresh fruit
    Instructions
    1. Whisk the flour, sugar, salt, and yeast together in a large bowl. Warm the milk and butter in a heatproof liquid measuring cup in the microwave just until the butter melts. Allow the milk-butter mixture to cool until it's warm to the touch. Gradually whisk the milk-butter mixture into the dry ingredients until the batter is smooth. Beat the eggs and vanilla together in a bowl and then whisk this mixture into the batter until incorporated. With a rubber spatula, scrape down the sides and bottom of the bowl to ensure there is no loose flour. Cover the bowl tightly with plastic wrap and refrigerate for 12-24 hours.
    2. When you're ready to make the waffles, heat your waffle iron according to manufacturer's instructions and then remove the batter from the fridge. Whisk it briefly to recombine the batter (it will deflate) and prepare according to your waffle maker's instructions. Keep the waffles warm directly on the racks of a 250° F oven while you make the rest.
    3. Freeze any leftover waffles on a wire rack then transfer frozen waffles to a large zip-top bag. When you're ready to reheat, preheat the oven to 250° F and warm the waffles through directly on the rack.

    Friday, February 13, 2015

    the BEST pizza ever!

    We found this recipe for pizza crust    (and the original recipe for the artisan bread) at Gwen's Nest blog.  Gwen goes into the benefits of long, cold fermentation and carbs and gluten.

     Our dough is much slacker, especially the longer it sits in the fridge, and wetter and we like a thinner crust that you see pictured at Gwen's Nest.   The photos of ours below are from before we worked into making it thinner and wetter.  Sorry!   Maybe one reason ours is thinner is we let the dough sit a lot longer in fridge before using, but we like it like that!   Even though it's thin, it's more soft and chewy than crispy.  Yum!!!

    Our basic dough will make 2 - 15" thin crust pizzas:
     
    Flour mix of:  approx.  ½ cup barley, 1 ½ cups oat, 4 cups +/- white spelt

    1 T. salt

    1 ½ tablespoons yeast

    2 ½ cups warm water
    Mix it up (it will be a wet dough - no kneading required!!!) and let it sit covered until it rises and starts to fall again.  Then put into a container and keep well covered in the fridge for at least a few days up to about 7 to 10 days or so.  It can get a dark gray liquid sitting on top of the dough like a sourdough starter does.  I just pour it off if necessary.    


    Cooking instructions:  (details at links at the beginning of post)
    450 degree oven - heat with baking stone.  Spread the dough on parchment paper and use a pizza peel to slide onto stone.  Bake for approx. 10 minutes.  Top the pizza and return to oven for about 10 more minutes.  Broil briefly if necessary.  
    ....one time we let it go so long (maybe 2 weeks?)  and it smelled very much like sourdough, even while baking, but the finished product didn't taste sour at all!  Not that we'd have minded, but our guests might have!  


    We've topped it with ALL KINDS of things:  BBQ sauce, brisket (or chicken) and cheddar, sun-dried tomato pesto with mozzarella, cremini mushrooms cooked ahead in butter, olives, sauteed onion and red peppers, pepperoni or homemade Italian sausage....we've used homemade Arugula pesto, Basic pesto and regular tomato paste sauce recipe from Elana's Almond Flour cookbook.   It's our favorite dinner to have when company is coming because it's easy to have things ready ahead of time and the right guests like to help out and make the pizza!   Add a salad and dessert and there you have it!   It's so easy to heat up leftover in the toaster oven briefly and it's almost as good as fresh!   

    We try to always have a batch in the fridge ready to go.  It also helps to save the space for the permanent container!  =)   One day soon we will try making some bread sticks like we've seen Julia Child make. 

     The dough is very soft/lax, and as long as your hands are wet, they won't stick too badly.

    We like to top the crust with fresh Parmesan, some times we only sprinkle the edges, instead of the whole thing.

     Yum...